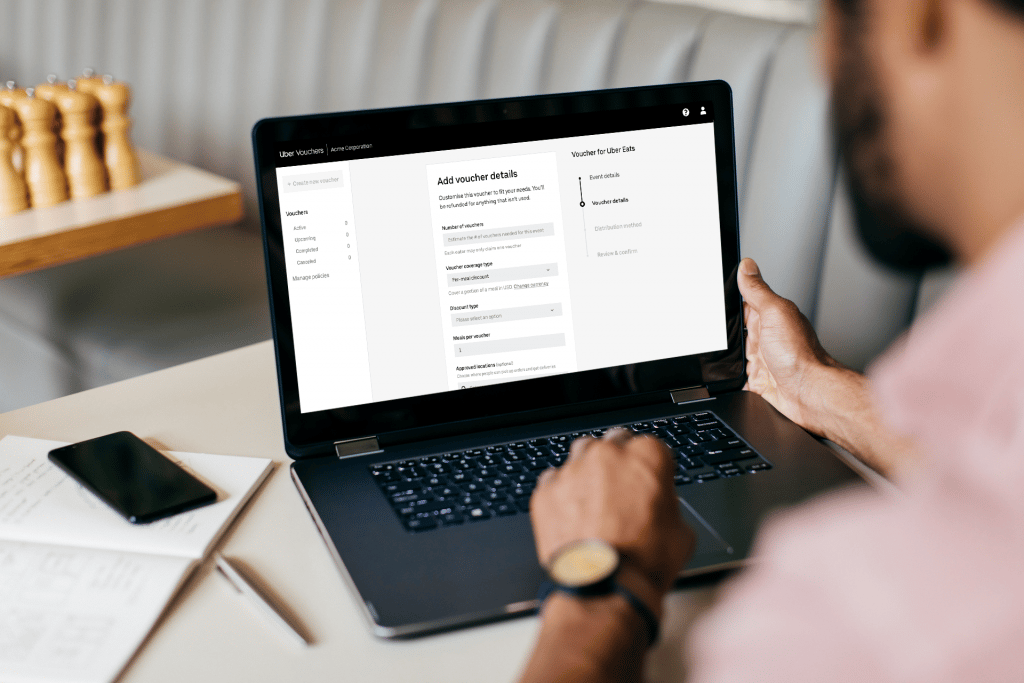
Uber Vouchers can help your organisation grow sales, reward employees, connect with customers and more.
Vouchers allow companies to cover the cost of meals or rides through individual Uber links distributed to customers or employees. Within minutes, you can create multiple Vouchers and easily distribute them by sending a general or unique link via email or SMS.
To create Vouchers, you’ll need to have an Uber for Business account. If you don’t already have one, you can sign up here. Alternatively, you can speak to an Uber for Business representative to learn more about our meal and rides programs. Simply submit your details via the Contact Us form.
How to create an Uber Voucher campaign for your business
- Sign in to your Uber for Business dashboard, navigate to the left column and click “Provide Vouchers”. If you are not an account admin, coordinators can also access the Vouchers dashboard by visiting vouchers.uber.com
- A new window will automatically open to your Vouchers dashboard. Select the “Create new Voucher” button.
- Choose the type of Voucher you’d like to create by clicking on one of the three available options: ‘All products’, ‘Eats’ or ‘Trips’.
- Enter your Voucher campaign details.
- Event name (this is the Voucher name visible to all recipients – i.e ‘Sales Kick-Off’).
- Event start and end dates (this sets the Voucher validity duration).
- Number of Vouchers (this is the number of recipients you want to distribute to).
- Voucher coverage type – choose between a set value: used across orders/trips until expired or, refillable daily / weekly / monthly” OR a Per meal/trip discount: select number of meals/trips, $ amount off, % off per meal/trip OR the option for fully covered rides.
- Enter the recipients list for distribution and include
- First and last name
- Email address AND/OR Phone number
- Select the distribution method
- General Voucher link (same link for all users. Great when you want to send one link to all users or convert a QR code [i.e. one email or post])
- Unique Voucher link (different link for all recipients, individual will receive their own unique link providing granular tracking and controls on usage)
- Review your Voucher distribution summary and click ‘Confirm and continue’.
The Vouchers will be sent to recipients via email, SMS and/or push notifications, and Uber may also send reminder messages to recipients from time to time. It is part of all Uber for Business agreements that you must obtain adequate consent from each Voucher recipient to receive their Voucher via SMS.
To learn more on creating or customising Vouchers, please contact the Uber for Business support team at business-support@uber.com
FAQs
How far in advance can I create Vouchers?
You can create Voucher campaigns up to six months in advance. When setting the time frame, add a start and end date.
Can I create multiple Voucher campaigns at the same time?
Yes, you can create multiple Voucher campaigns at once. If you distribute multiple Vouchers to recipients, the Voucher that is set to expire first will be applied to the trip or order. Two Vouchers cannot be applied to one order.
How can I track my Voucher campaign?
Visit the vouchers dashboard and select the desired program (vouchers.uber.com). Click the arrow on the right of the program to expand program details. View number of vouchers claimed, total spend to date and associated trips / orders taken. For a more detailed view, Select “download csv” to view the total campaign report.
Can I set Voucher limitations to trip locations?
Yes, you can set limitations on the locations where ride Vouchers can be used. To do this, set a pickup and drop-off location when creating the Voucher. There are no limits to the number of locations you can add.
Can I add other restrictions to my Voucher campaigns?
Yes, you can set up restrictions for your Vouchers. Common restrictions can include: delivery location, merchant types, or item level restrictions (such as alcohol). Voucher restrictions can be added during the Voucher creation process.
How much will my Voucher campaign cost my business?
The Cost Estimator feature (available to you in the Voucher set up process) can help you determine how much your Voucher campaign will cost. Once you enter the number of Vouchers and amount per Voucher, a maximum potential budget will appear in the Cost Estimator box. You’ll only pay for the rides taken and meals ordered, so the amount you spend may actually be less.
How can I edit or cancel my Voucher campaign?
In your Vouchers dashboard, navigate to the left hand column and select ‘Active’ (if the Voucher program has already started) or ‘Upcoming’ (if it hasn’t started) in the left column. Select the Vouchers program you want to edit or cancel. Click on the pencil icon on the section you’d like to change (note: some sections can’t be edited after a campaign is live) or select ‘Cancel event’. Note that your company is responsible for the total cost of any Vouchers redeemed before the program is cancelled.
What will happen if I cancel a Voucher campaign that has already started?
Once the campaign is cancelled, all Vouchers on that campaign (including those that have already been distributed) will immediately be void.
If I cancel a Voucher campaign that has started, will my recipients be notified? No. You’re responsible for informing customers who have received the Vouchers that the Vouchers are no longer valid; customers will not receive any such notice from Uber.
Grow with Uber for Business
Vouchers is just one product in our suite of Uber for Business solutions. Our global mobility, meals and delivery platform helps diverse companies achieve more, enjoy more and experience more at work.
Increased customer satisfaction, higher employee productivity and stronger team culture are just some of the results businesses see with Uber for Business. Learn how Uber for Business can help your organisation achieve its goals.
Posted by Uber for Business